The True Cost to Repair Vinyl Plank Flooring: 2026 Estimating Guide
Vinyl plank flooring is incredibly tough stuff. Manufacturers love to push the “100% waterproof and scratch-resistant” marketing angle. But contractors know the reality on the ground. Nothing is entirely bulletproof when you drag a 300-pound refrigerator across it.
If you are staring at a damaged floor right now, you just want to know the financial damage. You need real numbers. Not outdated averages from three years ago would help you. Only the actual cost to repair vinyl plank flooring in the current market can work like a charm.
Repairing a vinyl plank floor typically runs anywhere from $150 to $800, depending on the severity of the issue. Sometimes a repair is a quick thirty-minute plank swap. Other times? You end up pulling out half the living room just to fix a hidden subfloor nightmare.
Let’s break down the exact material rates, hourly labor costs, and hidden fees you need to factor into your estimate.
A 2026 Cost Snapshot Of Vinyl Plank Flooring Repair Cost
Before we get into the heavy details, here is a boots-on-the-ground look at what you can expect to pay for various repair scenarios right now.
| Repair Scenario | Average Cost Range | What it Includes |
| Minor Surface Scratch | $15 – $40 | DIY repair kits, putty, or stain markers. |
| Replacing 1 to 5 Planks | $150 – $350 | Contractor minimum call-out fee plus standard labor. Assumes you already have spare planks. |
| Water Damage & Subfloor Repair | $500 – $1,200+ | Removing flooring, drying the area, replacing damaged plywood subfloor, and reinstalling new LVP. |
| Buckling or Lifting (Medium Area) | $300 – $600 | Pulling up the affected section, fixing expansion gap issues, and re-laying the planks. |
f
What Actually Drives the Estimate Up?
You can’t just slap a flat square-foot rate on a repair job. It doesn’t work that way in the real world. As a matter of fact, construction estimating software is also less efficient when it comes to assessing costs for repairs. Flooring installers and estimating professionals look at a few distinct variables before pricing out a fix.

1. The Type of Vinyl Flooring
Not all vinyl is created equal. If you are dealing with basic peel-and-stick vinyl tiles, the material cost is practically negligible. You might pay $1 to $2 per square foot. But Luxury Vinyl Plank (LVP) or Luxury Vinyl Tile (LVT) with a rigid core is a different story.
High-end Stone Plastic Composite (SPC) or Wood Plastic Composite (WPC) flooring easily costs between $4 and $8 per square foot. If you don’t have leftover planks from the original installation, sourcing an exact color match for a discontinued line is going to cost you a massive premium. Sometimes contractors have to hunt down specific dye lots, which drives material acquisition costs through the roof.
2. The Locking Mechanism
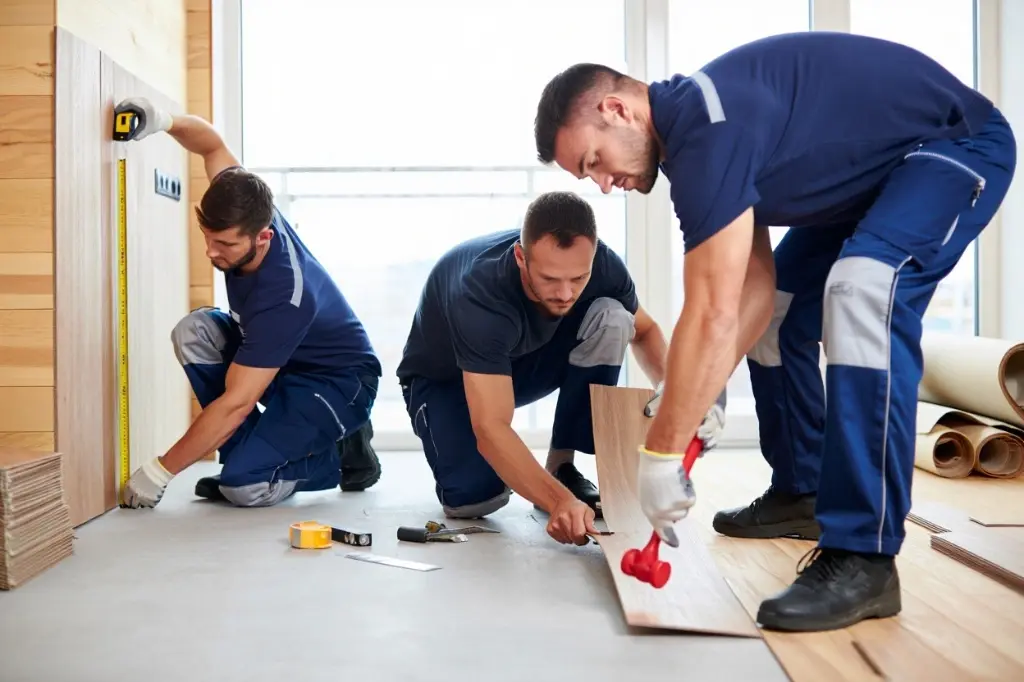
This is the biggest headache for localized repairs. Most modern LVP uses a click-and-lock system. They float over the subfloor. If a plank right in the middle of your hallway gets destroyed, you can’t just pop it out like a Lego piece. An installer usually has to remove the baseboards and carefully unclick row after row of flooring, starting from the nearest wall until they reach the damaged plank. Learn more about the installation cost of vinyl plank in our detailed guide [Average Cost To Install Vinyl Plank Flooring]
3. A Shortcut To Vinyl Repair
There is a shortcut method where contractors cut the damaged plank out with a utility knife, shave down the tongue of the replacement plank, and glue it into place. This “drop-in” method takes a fraction of the time. However, it compromises the structural integrity of the floating floor. A reputable contractor will charge more for the unclick-and-reclick method because it is labor-intensive, but it is the only way to guarantee the floor remains totally waterproof.
4. Current Labor Rates
Skilled labor isn’t getting any cheaper. Right now, expect to pay a flooring specialist anywhere from $60 to $120 per hour. Most independent contractors or flooring companies have a minimum service fee just to get the truck in your driveway. Even if swapping a single damaged plank takes twenty minutes, you are going to get hit with a $150 to $250 minimum charge.
Breaking Down Costs by Damage Type
To get a highly accurate estimate, you have to diagnose the exact type of damage.
Minor Scratches and Scuffs
Vinyl plank has a durable wear layer, usually measured in mils (ranging from 6 mil for cheap stuff to 20+ mil for commercial grade). When a chair leg drags and leaves a white streak, it usually means the clear wear layer is scuffed, but the printed design underneath is fine.
| How To Fix The Problem
You don’t need a contractor for this. Buy a vinyl floor repair kit online. They come with wax sticks or colored putty that you blend to match your floor’s grain. |
The Total Cost
$15 to $40 |
Deep Gouges and Tears
If you drop a heavy chef’s knife or drag a sharp piece of metal furniture across the floor, you might pierce entirely through the wear layer and the printed design layer, exposing the ugly core of the plank. Putty won’t hide this. The plank is dead.
| How To Fix The Problem
Plank replacement. If the damaged plank is near a wall, labor is minimal. If it’s dead center in a 400-square-foot room, the labor skyrockets. |
The Total Cost
$150 to $400, depending entirely on location and contractor minimums.
|
Buckling, Peeling, and Lifting
Have you noticed your floor starting to look like a mountain range? Buckling happens for a few reasons. Either the floor was installed without proper expansion gaps around the perimeter, or heavy furniture is pinning the floating floor down so it can’t naturally expand and contract with temperature changes.
| How To Fix The Problem
The installer has to remove the baseboards, pull up the affected rows, trim the edges of the planks to create a proper 1/4-inch expansion gap, and reinstall them. |
The Total Cost
Generally ranges from $250 to $600. It requires a fair bit of precise cutting and troubleshooting. |
Water Damage and Mold
LVP itself is completely waterproof. You can submerge a piece of it in a bucket for a year, and it won’t warp. But the subfloor underneath it? That is a different story entirely. If your dishwasher leaks, water seeps through the micro-seams between the planks and traps itself against the wooden plywood or OSB subfloor. Because the vinyl creates a vapor barrier, the water cannot evaporate. It just sits there. Rotting the wood. Growing mold.
| How To Fix The Problem
This is the nightmare scenario. All the flooring in the affected area must come up. The subfloor must be dried out with industrial fans, treated with antimicrobial spray, and any rotted plywood must be cut out and replaced. Finally, the flooring is reinstalled. |
The Total Cost
Easily $600 to $1,500+. The vinyl repair is the cheap part. Rebuilding the subfloor is what drains the budget. |
The Hidden Costs Nobody Mentions
Estimating a job isn’t just about measuring square footage and multiplying it by a material rate. Real-world construction has friction. Common quantity takeoff mistakes can cost budget overruns and delays in projects. Here are the hidden line items that often show up on an invoice.
● Furniture Manipulation:
Contractors are not moving companies. If a repair requires unclicking flooring halfway across your living room, somebody has to move the heavy sectional, the TV stand, and the rug. If the contractor has to do it, they will charge a premium for the physical labor and liability. Add $50 to $150 to the bill.
● Baseboard and Shoe Molding Replacement:
To pull up floating floor planks, the trim has to come off first. Quarter-round or shoe molding is brittle. It snaps easily when pried away from the wall. You will often have to pay for new trim material, plus the labor to cut, nail, caulk, and paint it. This easily adds $3 to $5 per linear foot to the final estimate.
● Subfloor Leveling:
Sometimes a floor gets damaged because it was installed poorly in the first place. If a plank cracks right down the middle, it usually means there is a massive dip in the concrete or wood subfloor beneath it. Installers can’t just put a new plank over the same hole. They have to pour a self-leveling compound or patch the subfloor before laying the new piece. Expect an extra $100 to $200 for floor prep.
Get a precise vinyl plank repair estimate from Nedes Estimating today.
DIY vs. Hiring a Professional
Can you fix this yourself? Absolutely. If you have the right tools and a Saturday afternoon to kill. To replace a plank in the middle of the room using the glue-down method, you just need a utility knife, some heavy-duty construction adhesive, a straight edge, and a steady hand. If you decide to do it the “right” way by unclicking the floor from the wall, you’ll need a pry bar, a tapping block, a pull bar, and a rubber mallet.
However, DIY is a massive risk if you don’t know what you are doing. The locking tongues on vinyl planks are incredibly fragile. It is remarkably easy to snap the locking mechanism while trying to force a piece back into place. Suddenly, one damaged plank turns into four damaged planks.
If you are a property manager overseeing multiple units, or a homeowner who wants a flawless finish, hiring a specialized flooring contractor is almost always the more cost-effective move long-term. They have the specialized pull bars to tight-fit planks without causing secondary damage.
How to Prevent Future Damage
Once you write that check for the repair, you are going to want to make sure it doesn’t happen again. Protective measures cost pennies compared to contractor fees.
1. Felt Pads on Everything
Every chair, table, and sofa leg needs a heavy-duty felt pad. Do not use cheap rubber pads; they can actually cause chemical staining on certain vinyl finishes.
2. Ditch the Beater Bar
When vacuuming LVP, turn off the rotating beater bar. Those stiff bristles act like sandpaper over time, dulling the finish and creating micro-scratches.
3. Mind the Sunlight
Direct, intense UV light from large windows can cause vinyl flooring to heat up rapidly, leading to localized buckling and fading. Use sheer curtains or UV-blocking window films in rooms that get blasted by afternoon sun.
4. Use Plywood for Appliances
If you ever need to slide a refrigerator or an oven out for maintenance, never roll it directly on the vinyl. Lay down thin sheets of Luan plywood and roll the appliance over the wood.
Here’s A Result-Driven Tip From Experts To Secure an Estimate
When calling around for quotes, don’t just ask “how much to fix a scratch.” Be specific. Tell the estimator the square footage of the room, the brand of the flooring if you know it, whether you have extra material on hand, and send clear, well-lit photos of the damage.
The more granular data you provide upfront, the more accurate your initial quote will be. A solid contractor won’t just throw a random number at you. They will break down the labor, the trip charge, and the materials needed so you know exactly where your money is going.
When Repair Becomes Replacement
You want to save the floor and it makes sense. But there comes a very specific moment when pouring money into localized repairs is basically lighting cash on fire. Estimators call this the 30% rule.
What is the 30% Rule?
If the damage covers more than thirty percent of the total square footage in a continuous room, stop looking for patch jobs. Tear it all out. By the time you pay for the agonizingly slow labor of surgically extracting dozens of scattered planks, treating the subfloor in patches, and attempting to weave new boards into an old click-lock system, you will surpass the cost of a brand new installation.
Labor speed drops exponentially when contractors have to tiptoe around existing undamaged flooring. Tearing out an entire room and starting fresh allows a crew to fly through the square footage. You pay for more material, but you drastically slash the hourly labor rate.
The Dye Lot Dilemma
Let’s say you have a gouge dead center in the living room. You hop online, find the exact brand, the exact color name, and order a single box of planks. Problem solved, right? Not exactly!
The manufacturing process for Luxury Vinyl Plank involves high-definition printing. Just like wallpaper or fabric, flooring is created in batches called “dye lots.” The ink mixture and printing conditions vary slightly from batch to batch. If your floor was installed in 2023, and you buy replacement planks manufactured in 2026, they will not match. The grain pattern will be identical, but the color might be half a shade warmer or slightly more gray. When you lay them side by side on the floor, the new plank will stick out like a sore thumb.
Furthermore, you have to account for UV fading. Floors exposed to natural sunlight bleach over time. Even if you miraculously tracked down a dusty box of planks from the original 2023 dye lot sitting in the back of a warehouse, it is going to look completely different than the faded floor currently sitting in your sun-drenched living room.
How Professional Estimators Build Your Quote
When a professional flooring company or a construction estimator writes a bid for a complex repair, they don’t just guess a number. They build the quote using specific line items. If you want to know if you are getting ripped off, you need to understand how these estimates are structured.
Here is what a comprehensive repair bid actually looks like behind the scenes:
| Unit Estimation | Details |
| Mobilization & Setup | This is a flat fee. It covers gas, vehicle wear, and the time it takes the crew to carry tools inside and prep the work zone with plastic sheeting. Usually $75 to $150. |
| Demolition & Extraction | It is billed hourly or by the square foot. Pulling up baseboards safely takes time. Slicing out glued-down LVP is brutal, back-breaking work. |
| Subfloor Preparation | The ultimate wild card. If they pull up the vinyl and find a cracked concrete slab, they must grind it down or pour a self-leveling compound. If it’s a wood subfloor with rot, carpenters have to step in. Floor prep easily costs $1.50 to $3.00 per square foot. |
| Moisture Mitigation | If water caused the initial damage, a good contractor will test the slab with a calcium chloride kit or relative humidity probes before laying new vinyl. They might also apply a roll-on moisture barrier. Add another $1.00 per square foot. |
| Primary Material | The actual cost of the replacement planks and any specialized construction adhesive. |
| Installation Labor | The physical act of laying the floor. Floating systems usually run $2.00 to $3.50 per square foot for labor. Glue-down LVP in commercial spaces jumps to $3.00 to $5.00 per square foot due to adhesive setup times. |
| Trim and Finish | Cutting, nailing, and caulking new shoe molding. |
| Debris Haul Away | Dump fees are expensive. Contractors pass the cost of tossing heavy vinyl straight to the client.
|
Things You Need To Know About Repairing Luxury Vinyl Plank Flooring
When you first dropped serious cash on luxury vinyl plank flooring, the salesperson likely sold you on its indestructible, armor-like reputation. Waterproof? Yes. Bulletproof? Not even close.
Even the highest-grade SPC (Stone Plastic Composite) floors will eventually lose a violent battle against a dropped cast-iron skillet or a dragged solid oak dresser. But here is the critical detail contractors rarely mention during the initial sales pitch.
Fixing this specific material requires a completely different tactical approach than simply patching drywall or buffing a scuff out of solid hardwood.
Why Click-Lock Mechanics Complicate Your Repair
The absolute magic of modern luxury vinyl plank flooring lies in its flawless floating installation. The planks interlock tightly, snapping together to create a seamless, watertight barrier over your subfloor.
That interlocking tongue-and-groove system is a complete engineering marvel right up until the exact moment you crack a board dead center in your kitchen.
You cannot simply pry one piece straight up without brutally disturbing its neighbors. The rigid core prevents the material from bending. Forcing it usually snaps the delicate locking joints, rapidly turning a single broken plank into a cascading, expensive nightmare.
So, how do top-tier flooring specialists actually tackle a severely damaged LVP floor? They generally rely on two highly specific, battle-tested techniques:
1. The Unzip Method:
This is the safest, most structurally sound approach. Installers carefully remove the wall baseboards and physically “unzip” the floor row by row, starting from the closest parallel wall. They swap the ruined board, then re-click everything back into its original place. It costs significantly more in hourly labor, but it totally preserves the waterproof integrity of the room.
2. The Drop-In Surgery:
Need a cheaper, faster fix? Contractors will surgically score the broken plank with a heavy-duty utility knife, rip it out, and completely shave off the locking tongues of a fresh replacement board. They aggressively glue this modified plank directly down to the subfloor. It saves hours of tedious labor but technically compromises the floating nature of the flooring system.
Why Spare Material Is Necessary For Luxury Vinyl Plank Flooring?
The absolute biggest hurdle in repairing luxury vinyl plank flooring isn’t the physical labor at all. It is the visual match. These floors rely on hyper-realistic, high-definition photographic layers. If you do not have pristine spare material left over from the original installation day, blending a brand-new, factory-fresh plank into a slightly UV-faded room is incredibly tricky.
Always keep an extra, unopened box stored safely in a climate-controlled closet. That single box remains your ultimate insurance policy against astronomical future repair bills.
Will Homeowners Insurance Foot the Bill?
Nobody wants to pay out of pocket if they don’t have to. The instant instinct is to call the insurance adjuster. Hold the phone before you make that call.
Homeowners’ insurance policies are incredibly specific about what types of flooring damage they cover. Wear and tear is completely denied most of the time. A massive gouge because your movers dropped a piano? That’s on the moving company’s liability policy, not your homeowners’ insurance.
When Does Insurance Help?
Your policy typically only kicks in for “sudden and accidental” water damage. If your washing machine hose bursts on a Tuesday afternoon and floods the hallway, insurance will likely cover the tear-out, the subfloor remediation, and the total replacement of the LVP in that continuous space.
But there is a catch. If a pipe behind your refrigerator has a pinhole leak that slowly drips for six months, rotting the floorboards and warping the vinyl over time, insurance companies will almost certainly deny the claim. They consider slow leaks a maintenance failure on your part.
Always calculate the math before filing. If your deductible is $1,000, and a contractor bids the repair at $850, filing a claim is entirely useless and might just cause your monthly premiums to skyrocket next year. Keep the insurance card in your wallet unless you are dealing with a catastrophic, multi-room loss.
Final Prep Before You Hire
Do not sign the first estimate that hits your inbox. The flooring repair industry is notorious for massive price swings based entirely on how busy a contractor is that month. If a crew is slammed with massive commercial jobs, they will throw a “go away” price at your small residential repair. You might get quoted $1,200 for a job that should cost $400, simply because they don’t want the hassle of a tiny project.
Gather three written bids. Force the estimators to separate the material costs from the labor costs so you can compare the numbers side-by-side. Ensure the estimate explicitly states who is responsible for moving furniture and hauling away the trash.
Conclusion
Fixing your damaged flooring does not have to drain your bank account if you act fast. Ignoring a buckling plank or a minor water leak usually turns a cheap weekend fix into a massive subfloor disaster. The true cost of vinyl plank repair always comes down to the labor involved in assessing the damage and the availability of replacement materials.
Protect your investment with simple preventative measures like felt pads and moisture barriers. When in doubt, hire a seasoned estimator from NEDES to inspect the site. Our construction estimating services will provide hard numbers, ensuring you never pay for unnecessary work or hidden contractor fees.
Frequently Asked Questions
How to install vinyl plank flooring step-by-step?
To master how to install vinyl plank flooring, start by leveling your subfloor and laying a moisture barrier. Use spacers to maintain a 1/4-inch expansion gap. Angle the tongue of the new plank into the groove of the previous one, drop it flat, and tap it tight with a rubber mallet. Score and snap ends with a utility knife for a professional fit.
How much does a vinyl floor repair kit cost?
A standard DIY floor repair kit costs roughly fifteen to forty dollars online. These kits typically include colored wax or putty designed to mask superficial scratches. They work well for minor cosmetic flaws, but cannot fix structural plank damage at all.
Does homeowners’ insurance cover water-damaged vinyl floors?
Insurance usually covers damage from sudden, accidental incidents like burst pipes or appliance leaks. They will not cover slow, ongoing leaks or general wear and tear. Always check your specific deductible before filing a claim to ensure it makes financial sense.
Why is my luxury vinyl plank floor buckling and lifting?
Buckling usually happens because the floor lacks proper expansion gaps around the room perimeters. Vinyl expands slightly with temperature changes. If the planks are pinned tight against the wall or trapped under massive furniture, they have nowhere to go but up.
Can I put new vinyl planks directly over damaged ones?
You should never install new flooring over badly damaged, warped, or buckling vinyl planks. Any imperfections or moisture trapped in the old layer will eventually ruin the new floor. Always tear out the damaged sections to inspect and prep the subfloor.
How long does it actually take a contractor to fix my floor?
Swapping a few planks near a wall might only take an hour or two. Extensive water damage requiring subfloor repair and complete reinstallations can easily take two to four days. It depends entirely on the location and severity of the problem.
Is luxury vinyl tile truly waterproof against major floods?
The vinyl material itself is entirely waterproof and will not degrade. However, the flooring system is not completely watertight. Floodwater will seep through the locking seams, eventually causing severe mold, rot, and structural decay in the wooden subfloor underneath the planks.